How to Change an RV Tire Safely: Step-by-Step Guide

Alana Azzouz is a Senior Editor at Searchshop Media Network with over a decade of experience in consumer content quality and editorial standards. She has reviewed thousands of product guides, buying articles, and comp…
✎ Reviewed by Alana Azzouz — Senior Editor
Why trust us
RVGearInsider articles are researched by the Searchshop Editorial team using manufacturer specs, independent expert sources, and owner feedback. Our goal is simple: when an RVer searches for gear, the recommendations they read online should match what a knowledgeable dealer or experienced owner would actually suggest. We may earn a commission on qualifying affiliate purchases; it doesn't influence what we recommend — if a product changes or a better option comes along, the article changes too.
How to Change an RV Tire Safely: Step-by-Step Guide
If you’ve ever had a blowout or spotted a flat before pulling out of camp, knowing how to change RV tire safely can save time, money, and stress. We’ve tested tire-changing gear, reviewed roadside procedures, and learned that the biggest difference between a smooth tire swap and a dangerous one is preparation. In this guide, we’ll walk through the tools, safety steps, and exact process we recommend for changing an RV tire without putting yourself, your passengers, or your rig at risk.
Comparison Table

| Tool Type | Best For | Pros | Cons | What We Recommend |
|---|---|---|---|---|
| Scissor Jack | Small camper vans, very light trailers | Compact, inexpensive, easy to store | Often underpowered for larger RVs, slower lifting, less stable on uneven ground | Only for lighter rigs if rated correctly |
| Bottle Jack | Travel trailers, fifth wheels, many motorhomes | Strong lifting power, compact footprint, widely available | Needs level ground and proper cribbing, limited lift height on some models | Best all-around choice for most RV owners |
| Hydraulic Floor Jack | Home use, maintenance bays, paved camp storage | Stable, easy to position, smooth lifting | Heavy, bulky, not ideal to carry on every trip | Great for driveway maintenance, less practical for roadside use |
| Breaker Bar | Loosening stubborn lug nuts | More leverage than standard lug wrench, durable | Slower than power tools, requires physical effort | Highly recommended as a backup tool |
| Cordless Impact Wrench | Fast lug nut removal | Quick, convenient, less strain | Battery dependent, may not fully torque nuts correctly | Excellent convenience tool, but always finish with torque wrench |
| Torque Wrench | Final tightening | Accurate, protects wheels and studs | Adds one more tool to carry | Essential, not optional |
Key Takeaways
- Always move the RV to the safest, flattest location possible before attempting a tire change.
- Chock the wheels and stabilize the rig before lifting anything.
- Use a jack and lug wrench rated for your RV’s weight, not a light-duty automotive tool.
- Loosen lug nuts before raising the tire off the ground.
- Lift only at manufacturer-approved jacking points.
- Tighten lug nuts in a star pattern and torque them to spec.
- Recheck lug nut torque after 25 to 50 miles.
- If traffic, soft ground, or unstable conditions make the job unsafe, call roadside assistance.
Why RV Tire Changes Require Extra Caution

Changing a passenger car tire is one thing. Changing an RV tire is different because the vehicle is heavier, taller, and often less stable when lifted. A travel trailer, fifth wheel, motorhome, or camper van all place different loads on the axle and frame. We recommend treating every RV tire change as a heavy-duty roadside repair, not a quick side-of-the-road task.
A bad jack point, loose soil, or an undersized wrench can turn a flat tire into a damaged axle, bent frame, or serious injury. That’s why we always start with safety and equipment before touching a lug nut.
Tools and Gear We Recommend
Before you learn the actual process, make sure you have the right equipment on board.
Essential RV Tire Change Tools
- Heavy-duty bottle jack or hydraulic jack rated for your RV
- Wheel chocks
- Lug wrench, breaker bar, or impact wrench
- Torque wrench
- Correct-size socket for lug nuts
- Spare tire in usable condition
- Reflective triangles or road flares
- Work gloves
- Flashlight or headlamp
- Wood or jack pads for soft ground
- Tire pressure gauge
- Owner’s manual for jacking points and torque specs
Optional But Helpful
- Portable air compressor
- Knee pad or ground mat
- TPMS sensor wrench if needed
- Cordless impact wrench with charged batteries
Buyer’s Guide: Best Types of RV Tire-Changing Tools
We’ve compared the most common tool categories RV owners carry so you can match your setup to your rig size and travel style.
Pros and Cons of Changing an RV Tire Yourself
Pros
- Saves time when roadside assistance is delayed
- Gives you more control over your schedule and location
- Helps you inspect brakes, hubs, and wheel condition while the tire is off
- Builds confidence for future emergencies
Cons
- Can be dangerous on highways, shoulders, or uneven ground
- Requires heavy-duty tools and proper technique
- Some RVs are too heavy or awkward for safe roadside tire changes
- Incorrect lifting or torque can cause expensive damage
Before You Start: Safety Checklist
Before we change any RV tire, we run through this checklist.
Safety Notes
- Never change a tire on a slope if you have any safer alternative.
- Never crawl under an RV supported only by a jack.
- Never use leveling jacks as tire-changing jacks unless the manufacturer explicitly allows it.
- Never place the jack under thin sheet metal, unstable suspension parts, or non-approved frame areas.
- If the flat is on the traffic side of the RV and shoulder space is limited, call for professional help.
Pre-Change Checklist
- Pull as far off the road as possible onto firm, level ground.
- Turn on hazard lights.
- Set out reflective triangles behind the RV.
- Put the transmission in park or in gear, depending on the rig type.
- Apply the parking brake.
- Chock the wheels that will remain on the ground.
- Confirm the spare tire is inflated and undamaged.
- Locate the correct jacking point in the owner’s manual.
- Gather all tools before lifting the RV.
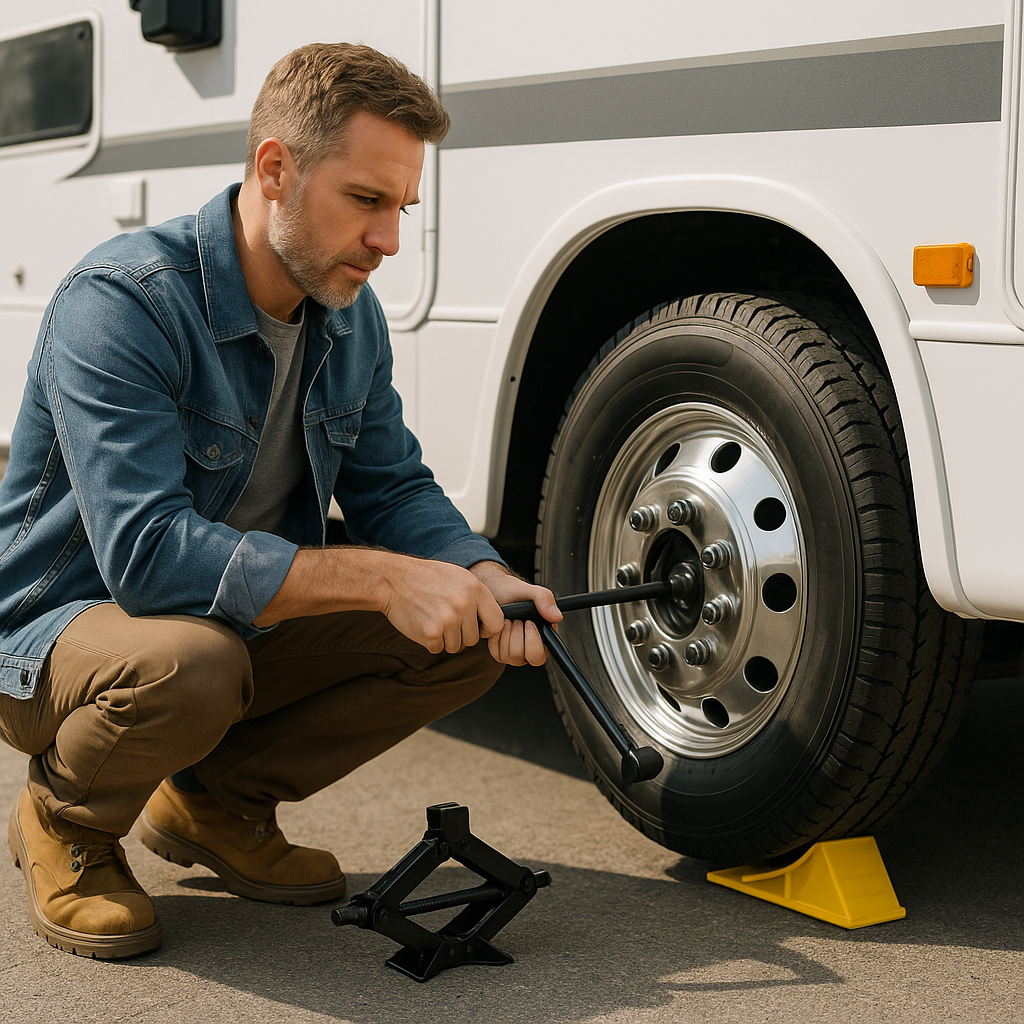
How to Change an RV Tire Safely
Step-by-Step Guide
1. Find the Safest Possible Location
If the tire fails while driving, reduce speed gradually and avoid sudden steering inputs. We recommend rolling slowly to a wide shoulder, parking area, rest stop, or side road if possible. A safer location is more important than stopping immediately in a dangerous lane position, as long as the tire has not caused loss of control.
2. Secure the RV
Set the parking brake and place wheel chocks on the opposite side of the flat. For trailers, chock both sides of the tires that remain on the ground. Stability matters more than speed here.
3. Inspect the Flat Tire and Surrounding Area
Before lifting, look for shredded tread, damaged wheel wells, hanging wires, brake line issues, or bent metal. If the blowout caused structural damage, a simple tire swap may not be enough to make the RV roadworthy.
4. Position the Jack at the Approved Lift Point
Check the owner’s manual for the exact jacking location. On many trailers, this is near the axle spring seat or a reinforced frame point. On motorhomes, it may be a designated chassis lift point. We recommend using a wood or composite jack pad under the jack if the ground is soft.
5. Loosen the Lug Nuts Slightly
Before raising the tire off the ground, break each lug nut loose about a quarter turn. Do not remove them yet. This is safer and easier while the wheel still has some contact with the ground.
6. Raise the RV Until the Tire Clears the Ground
Pump or extend the jack slowly. Lift only as much as needed to remove the flat tire. If the RV shifts, stop immediately and lower it. Reposition the jack and chocks before trying again.
7. Remove the Lug Nuts and Tire
Finish removing the loosened lug nuts and place them somewhere clean and easy to reach. Pull the flat tire straight off the studs. On heavier assemblies, use your legs and keep your back straight.
8. Mount the Spare Tire
Align the spare with the wheel studs and slide it fully into place. Hand-thread the lug nuts first. This helps prevent cross-threading, which can ruin studs and make future service difficult.
9. Snug the Lug Nuts in a Star Pattern
Using the wrench, tighten the lug nuts lightly in a crisscross or star pattern. This helps seat the wheel evenly against the hub.
10. Lower the RV Partway and Pre-Tighten
Lower the RV until the spare just contacts the ground enough to keep it from spinning. Then tighten the lug nuts more firmly in the same star pattern.
11. Lower the RV Fully and Torque the Lug Nuts
Lower the jack completely and remove it. Use a torque wrench to tighten each lug nut to the manufacturer’s specification, again in a star pattern. We never recommend guessing here. Proper torque is critical for wheel retention.
12. Check Tire Pressure and Pack Up
Confirm the spare tire is inflated to the correct PSI for your RV. Stow the flat tire and all tools securely. Pick up wheel chocks and reflective triangles only when you are fully ready to drive.
13. Recheck Torque After Driving
Drive 25 to 50 miles, then stop in a safe place and recheck lug nut torque. This is one of the most overlooked steps in the whole process.
Special Tips by RV Type
Travel Trailers and Fifth Wheels
- Chock both sides of the tires on the opposite axle position.
- Confirm whether your axle manufacturer permits lifting directly near the axle tube or spring seat.
- Avoid lifting on weak frame sections.
Motorhomes
- Weight ratings are higher, so tool capacity matters even more.
- A roadside tire change may be less practical for larger Class A rigs.
- If the inner dual tire fails, professional service may be the safer option.
Camper Vans and Class B RVs
- These are often closer to standard van tire procedures.
- Factory jacking points may be easier to access.
- Still verify tire load range and torque specs carefully.
Common Mistakes to Avoid
Using the Wrong Jack
A jack that works for a half-ton pickup may not be adequate for a heavy trailer or motorhome. We always recommend checking both lift capacity and lift range.
Skipping Wheel Chocks
The parking brake alone is not enough, especially for trailers.
Tightening Without a Torque Wrench
Overtightened or undertightened lug nuts can both create dangerous conditions.
Lifting on Unstable Ground
Sand, mud, gravel, and hot asphalt can let a jack sink or tilt.
Ignoring Spare Tire Condition
A spare with dry rot, low pressure, or the wrong load rating is not a real backup.
When to Call Roadside Assistance Instead
There are times when the safest answer is not DIY. We recommend calling for help if:
- You are on a narrow highway shoulder
- The ground is soft or sloped
- You do not know the approved jack points
- The RV is too heavy for your equipment
- A blowout damaged the wheel, brakes, or bodywork
- You have a dual-wheel setup you are not comfortable servicing
FAQ
1. Can we use RV leveling jacks to change a tire?
Only if the RV manufacturer specifically states that the leveling system is approved for tire changes. In many cases, it is not recommended.
2. Should we loosen lug nuts before jacking up the RV?
Yes. We recommend loosening them slightly while the tire is still touching the ground. It reduces wheel spin and improves control.
3. How tight should RV lug nuts be?
They should be tightened to the exact torque specification listed by the RV, wheel, axle, or chassis manufacturer. Always use a torque wrench.
4. Can we drive on the spare tire for a long distance?
That depends on the spare type, load rating, and your RV manufacturer’s guidance. Many RV spares are intended as temporary solutions, so replace or repair the damaged tire as soon as possible.
5. What is the safest surface for changing an RV tire?
Firm, level pavement is best. If that is not available, use a sturdy jack pad and make sure the jack cannot sink or shift.
Get your free Get Our Free Full-Timer's Gear Guide
The no-fluff gear list trusted by full-time RVers — tested in real conditions across North America.
Final Thoughts
Learning how to change an RV tire is less about speed and more about doing each step in the right order. We recommend carrying the correct tools, knowing your RV’s lift points, and practicing the process at home before you ever need it on the road. A flat tire is stressful enough without figuring out your jack, socket size, or torque specs in traffic.
If you travel often, the best approach is simple: inspect your tires regularly, keep your spare ready, and prepare for the day when a roadside tire change becomes unavoidable. Done safely, it’s a manageable job. Done carelessly, it can become a serious hazard.