How to Upgrade Your RV Furniture Without Breaking the Budget

Alana Azzouz is a Senior Editor at Searchshop Media Network with over a decade of experience in consumer content quality and editorial standards. She has reviewed thousands of product guides, buying articles, and comp…
✎ Reviewed by Alana Azzouz — Senior Editor
Why trust us
RVGearInsider articles are researched by the Searchshop Editorial team using manufacturer specs, independent expert sources, and owner feedback. Our goal is simple: when an RVer searches for gear, the recommendations they read online should match what a knowledgeable dealer or experienced owner would actually suggest. We may earn a commission on qualifying affiliate purchases; it doesn't influence what we recommend — if a product changes or a better option comes along, the article changes too.
How to Upgrade Your RV Furniture Without Breaking the Budget
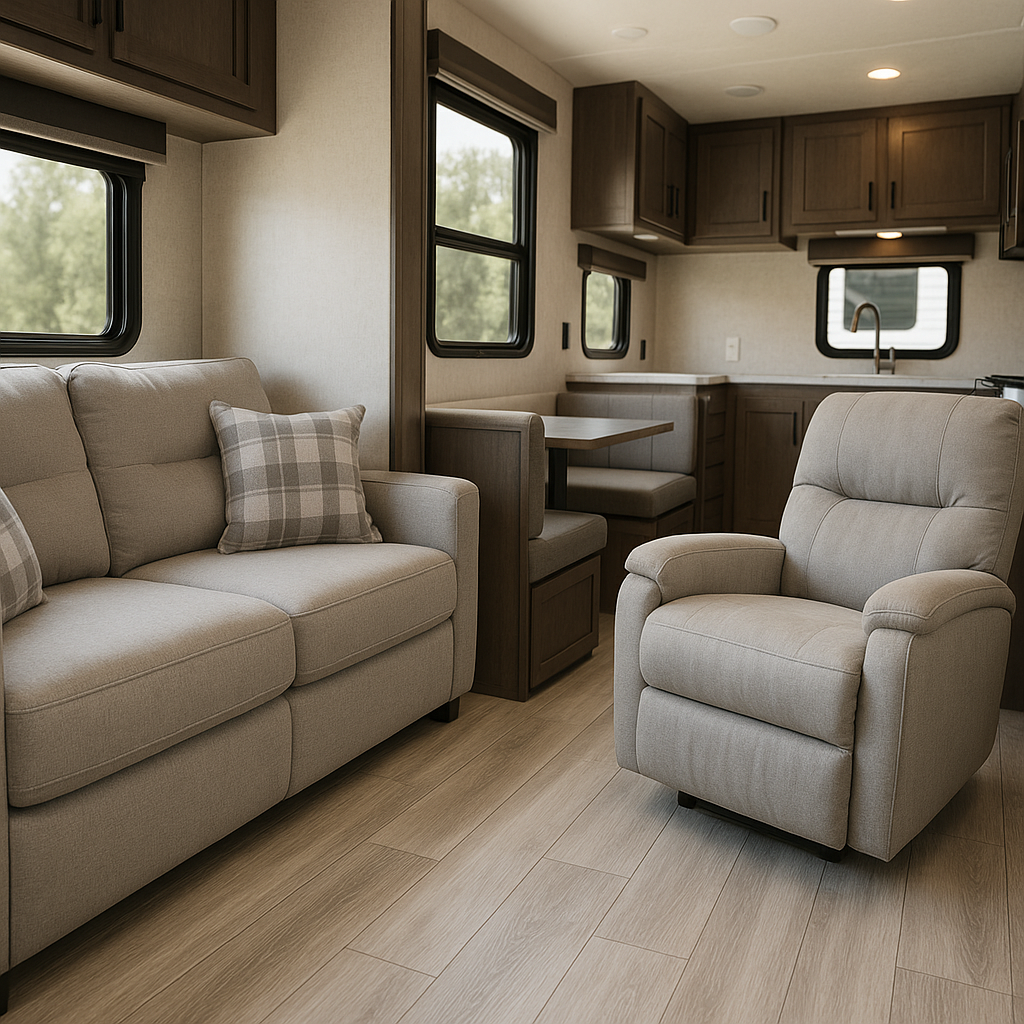
If you’ve been wondering how to upgrade RV furniture without draining your travel fund, the good news is that you have more options than you might think. We researched budget-friendly approaches ranging from slipcovers and reupholstery kits to full furniture swaps, and in many cases, a tired RV interior can look dramatically better for a fraction of the cost of a full remodel. The key is knowing what to keep, what to replace, and how to measure carefully before you buy.
In this guide, we’ll walk through affordable ways to refresh your RV seating, dinettes, and sleeping areas while keeping weight, size, and installation challenges in mind.
Comparison Table: Best Budget RV Furniture Upgrade Approaches

| Upgrade Option | Typical Cost | Difficulty | Best For | Pros | Cons |
|---|---|---|---|---|---|
| Slipcovers | $30-$150 | Easy | Worn sofas and dinette cushions | Fast, cheap, removable | May look loose if poorly fitted |
| Reupholstery or cushion covers | $100-$500 | Moderate | Peeling jackknife sofas, dinettes | Big visual improvement, keeps original frame | Time-consuming, fabric costs add up |
| Foam replacement | $80-$300 | Moderate | Flat cushions and mattresses | Major comfort boost | Requires exact sizing |
| Residential furniture swap | $200-$800 | Moderate | Older RVs with open layouts | Stylish, comfortable, widely available | Weight and fit can be issues |
| RV-specific replacement furniture | $500-$1,500+ | Moderate to Hard | Recliners, theater seating, sleeper sofas | Built for RV sizing and entry doors | More expensive |
| DIY paint and hardware refresh | $20-$100 | Easy | Dinette bases, wood trim, tables | Lowest-cost makeover | Mostly cosmetic |
Why RV Furniture Upgrades Matter
RV furniture takes a beating. Sun exposure, humidity, pet wear, and frequent use can make factory-installed pieces crack, sag, or peel long before the rest of the coach feels outdated. We recommend upgrading for three main reasons:
- Better comfort for long trips
- Improved storage and functionality
- A cleaner, more modern interior look
The best part is that not every upgrade requires replacing everything. Sometimes the smartest budget move is improving what you already have.
Budget-Friendly RV Furniture Upgrade Options

Before buying anything, it helps to compare the most practical upgrade paths.
Step 1: Decide Whether to Refresh or Replace
The first step in learning how to upgrade RV furniture is deciding what actually needs attention.
Refresh If:
- The frame is solid
- The furniture is bolted in securely
- The issue is cosmetic, like peeling vinyl or dated fabric
- You want the lowest-cost option
Replace If:
- The frame is broken or wobbly
- Cushions have no support left
- The furniture is uncomfortable for daily use
- You want added features like recliners, storage, or a sleeper
We usually recommend refreshing first if the structure is still good. Replacing RV furniture gets expensive quickly, especially when shipping is involved.
Step 2: Measure Everything Carefully
This is where many RV owners make costly mistakes. RV furniture must fit not only the living area, but also the entry door, hallway, slide clearance, and tie-down points.
Measurements to Take
- Width, depth, and height of the current furniture
- Door opening width and height
- Hallway and corner clearance
- Distance from walls, cabinets, and slide-outs
- Seat height and recline clearance
Pro Tip
We recommend making a simple sketch and writing every measurement down before shopping. If you’re buying residential pieces, check whether legs or backs can be removed for installation.
Step 3: Set a Realistic Budget
A budget upgrade doesn’t mean buying the cheapest item available. It means spending where comfort matters and saving where appearance can be improved with DIY work.
Sample Budget Ranges
- Under $150: Slipcovers, throw pillows, paint, table refinishing
- $150-$500: New foam, custom cushion covers, used furniture finds
- $500-$1,000: Budget recliners, loveseat replacements, mattress upgrades
- $1,000+: RV theater seating, sleeper sofas, full interior refresh
We’ve found that many RV interiors can be transformed for $300 to $700 if you focus on the most visible and most-used pieces first.
Step 4: Gather Tools and Materials
Here’s what we recommend having on hand before starting.
Tools
- Tape measure
- Drill/driver
- Socket set or wrench set
- Screwdrivers
- Utility knife
- Staple gun
- Pry bar
- Level
- Stud finder or mounting locator if needed
Materials
- Slipcovers or upholstery fabric
- Replacement foam or cushions
- Bolts, washers, and brackets
- Thread locker
- Touch-up paint or furniture paint
- Sandpaper
- Wood filler
- Non-slip pads
- Storage bins or baskets for added function
Step 5: Remove Old Furniture Safely
Factory RV furniture is often bolted to the floor or wall. Don’t assume it will lift right out.
Safety Tips Before Removal
- Disconnect shore power if working near powered recliners or outlets
- Wear gloves to avoid cuts from metal brackets
- Use eye protection when drilling or prying
- Lift with help, especially in narrow RV aisles
- Keep track of all hardware in labeled bags
Removal Process
- Empty nearby cabinets and floor space.
- Check under cushions and furniture bases for mounting bolts.
- Remove visible screws, brackets, and retaining straps.
- Disconnect any electrical components.
- Tilt and rotate furniture carefully toward the exit.
- Protect walls and door frames with moving blankets.
We recommend taking photos before removal so reinstallation is easier if you reuse the same mounting points.
Step 6: Upgrade in the Most Cost-Effective Order
If your budget is tight, follow this order for the biggest impact.
1. Replace Cushion Foam
Old foam makes even decent furniture feel terrible. New high-density foam can make a dinette or sofa feel almost new.
2. Add New Covers or Reupholster
Custom cushion covers, marine vinyl, or durable upholstery fabric can modernize an RV fast. We like this option when the furniture shape still works well.
3. Swap the Most Uncomfortable Piece
Usually that’s the sofa, recliner, or mattress. Replacing just one major item can change how the whole RV feels.
4. Refresh the Dinette and Table
Painted bases, new laminate, or a removable tabletop cover can deliver a strong visual upgrade for little money.
5. Add Soft Finishing Touches
Throw pillows, blankets, and coordinated storage baskets help tie the space together without major expense.
Step 7: Install and Secure New Furniture Properly
This step matters more in an RV than in a house. Furniture must stay stable while traveling.
Installation Steps
- Dry-fit the furniture in place before securing it.
- Confirm slide clearance and walking space.
- Mark mounting points.
- Use appropriate brackets or anchors for the floor structure.
- Tighten all fasteners evenly.
- Test movement, recline, and nearby cabinet access.
- Drive a short test route and recheck hardware.
We recommend using thread locker on bolts that may loosen from road vibration.
Pros and Cons of Budget RV Furniture Upgrades
Pros
- Much cheaper than a full remodel
- Can improve comfort immediately
- Lets you customize style and function
- Many projects are DIY-friendly
- Great way to extend the life of an older RV
Cons
- RV sizing limits your furniture choices
- Cheap materials may wear out quickly
- Residential furniture can add too much weight
- Installation may require drilling or bracket work
- Matching existing decor can take some planning
Who It’s For
This kind of upgrade is ideal for:
- RV owners with peeling or outdated factory furniture
- Weekend campers who want a cleaner, more comfortable interior
- Full-timers trying to improve comfort without a full renovation
- Used RV buyers fixing up an older rig
- DIYers who want a high-impact project on a modest budget
If your current furniture is structurally sound, we strongly recommend starting with foam and fabric upgrades before committing to expensive replacements.
Smart Buying Tips Before You Order
Prioritize RV-Friendly Materials
Look for easy-clean fabrics, marine-grade vinyl, or stain-resistant upholstery if you travel with pets or kids.
Check Weight Ratings
Every added pound matters. Compare the weight of new furniture to what you remove.
Consider Multi-Use Pieces
Storage ottomans, fold-down tables, and sleeper loveseats can add function without increasing clutter.
Shop Used and Clearance Deals
We’ve seen excellent bargains at RV salvage yards, Facebook Marketplace, Habitat ReStores, and local furniture outlets.
Verify Return Policies
Because fit is everything in an RV, a flexible return policy can save you from an expensive mistake.
Common Mistakes to Avoid
- Buying before measuring the entry door
- Ignoring slide-out clearance
- Choosing household furniture that is too heavy
- Failing to secure furniture for travel
- Spending too much on low-priority cosmetic items first
When We researched upgrade strategies, the best results came from fixing comfort issues first and cosmetic issues second.
Final Thoughts
Learning how to upgrade RV furniture on a budget comes down to planning, measuring, and focusing on the pieces that affect daily comfort the most. In many cases, you don’t need a full replacement to get a big improvement. New foam, fresh covers, a refinished dinette, or one carefully chosen furniture swap can make your RV feel newer and more livable without blowing your budget.
We recommend starting small, verifying every dimension, and investing in secure installation so your upgraded interior looks good at the campsite and stays safe on the road.
FAQ
1. Can we use regular household furniture in an RV?
Yes, sometimes. We recommend checking weight, dimensions, and whether the piece can be securely anchored. Residential furniture often costs less, but it may be harder to fit through the door and may not handle RV movement as well.
2. What is the cheapest way to upgrade RV furniture?
The cheapest route is usually slipcovers, replacement cushion covers, paint, and new foam. These upgrades can dramatically improve appearance and comfort without replacing the entire piece.
3. Is it hard to remove factory RV furniture?
Usually not, but it can be awkward. Most RV furniture is bolted down, and some pieces have hidden brackets or electrical connections. We recommend taking photos and labeling hardware during removal.
4. Should we replace RV cushions or just add toppers?
If the foam is badly flattened, replacement is the better long-term fix. Toppers can help temporarily, but they usually won’t solve major support issues.
5. How do we keep new RV furniture secure while traveling?
Use proper brackets, anchor points, and bolts rated for the load. After installation, test for movement and recheck all fasteners after your first trip.
Get your free Get Our Free Full-Timer's Gear Guide
The no-fluff gear list trusted by full-time RVers — tested in real conditions across North America.